Bitzal-JS Guides about Claims
If you participated in a previous ZAL sale before 2020 and received your ZAL allocation indicator tokens, you can now claim your ZAL (and a proportional amount of OGG on the Ogona network). The claim process connects the address where your ZAL indicators have been stored on Ethereum with a native Bitzal address and, if your ETH address is eligible, will pay the tokens to the Bitzal address.
To do this, you must sign a message on Ethereum containing the address of your Bitzal account. You can do this by using the Bitzal-JS UI Claims app. Ensure that you are connected to the Bitzal network (displayed in the upper-left-hand corner of the screen).
Claiming using a third-party process can lead to losing your allocation; therefore, we cannot recommend using any third-party apps. Manually specifying your transaction data, as specified in our claims process below, is the only way to ensure you will receive your allocation.
Generate an Account
You will need to generate an account on the relay chain to claim ZAL (or OGG on Ogona). See the available wallets and extensions for more information about wallets and browser extensions you can use to create an account. In terms of hardware wallet support, you can use the Ledger devices or Bitzal Vault.
Claiming Tokens
The Bitzal-JS Claims app will guide you through the process of claiming the tokens.
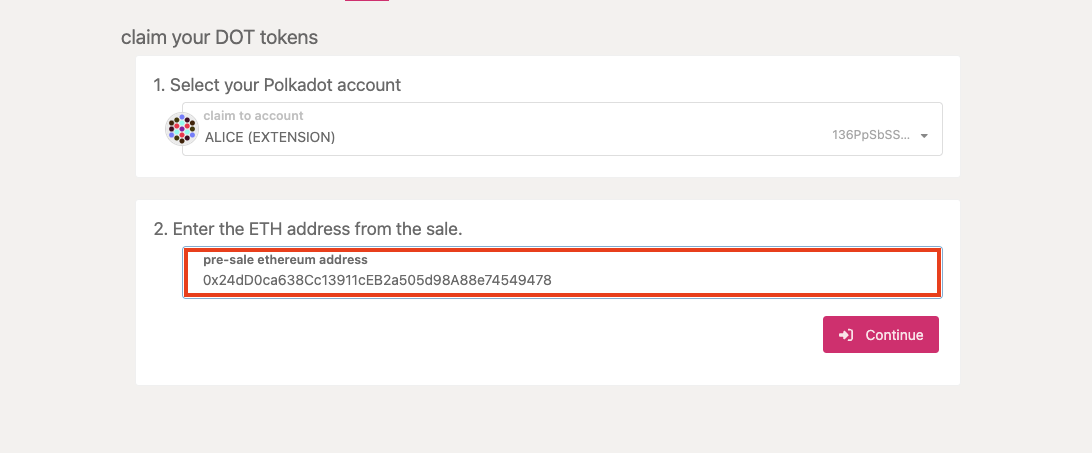
Select Accounts
Select the account you would like to claim the tokens into and click the "Continue" button to proceed. Your screen should look something like this:

Select Account on Ethereum
Paste the Ethereum address with the ZAL allocation indicator tokens and click the "Continue" button to proceed.
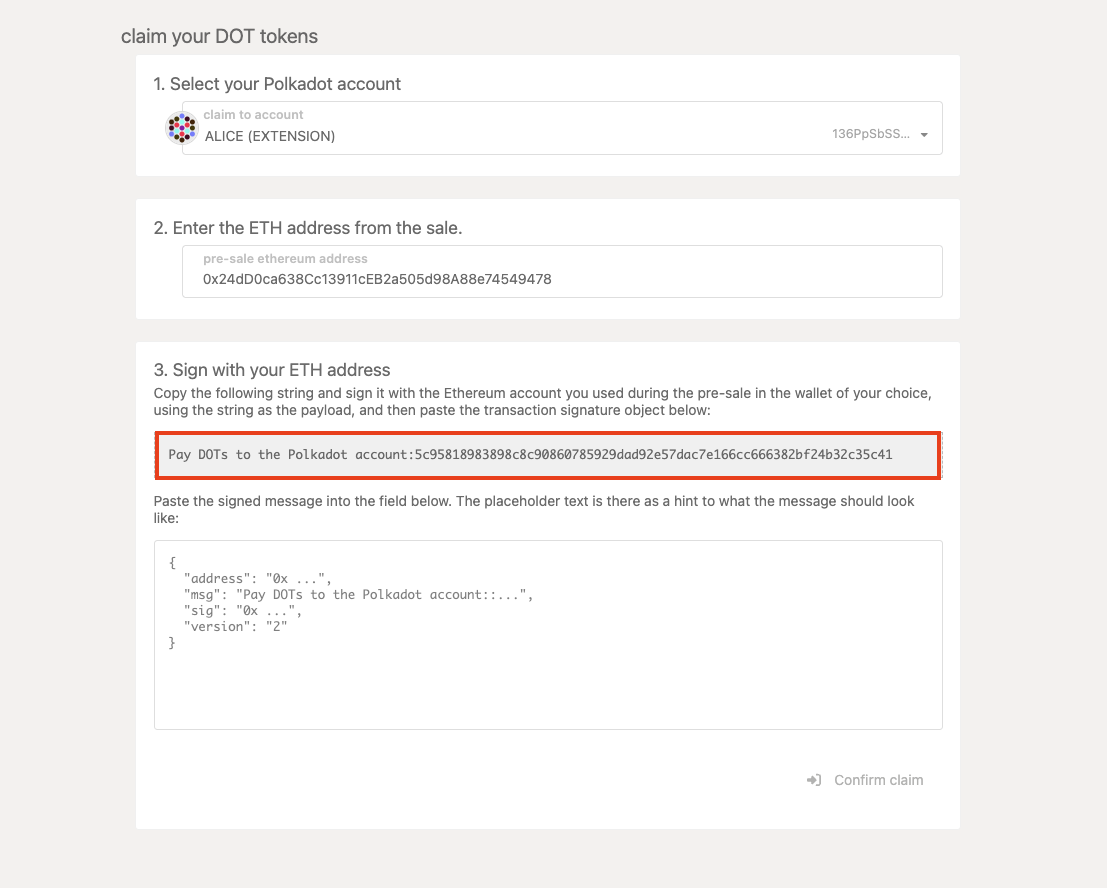
Sign Message on Ethereum & Claim
The hex-encoded string that follows the sentence "Pay ZAL to the Bitzal account:" is the
hex-encoded public key of your Bitzal account, minus the 0x prefix.
Go to the "Sign & Verify Message" tab on the MyCrypto web application. MyCrypto is good to use if you have stored the key to the Ethereum account holding your ZAL indicator tokens on a hardware device like a Ledger Nano. It also supports raw private keys, mnemonics, and the Bitzal Vault. After unlocking your Ethereum wallet, copy and paste the outputted sentence on the Bitzal-JS UI into the message box on the MyCrypto app. When you click "Sign Message" you will get a JSON output signature as shown below:
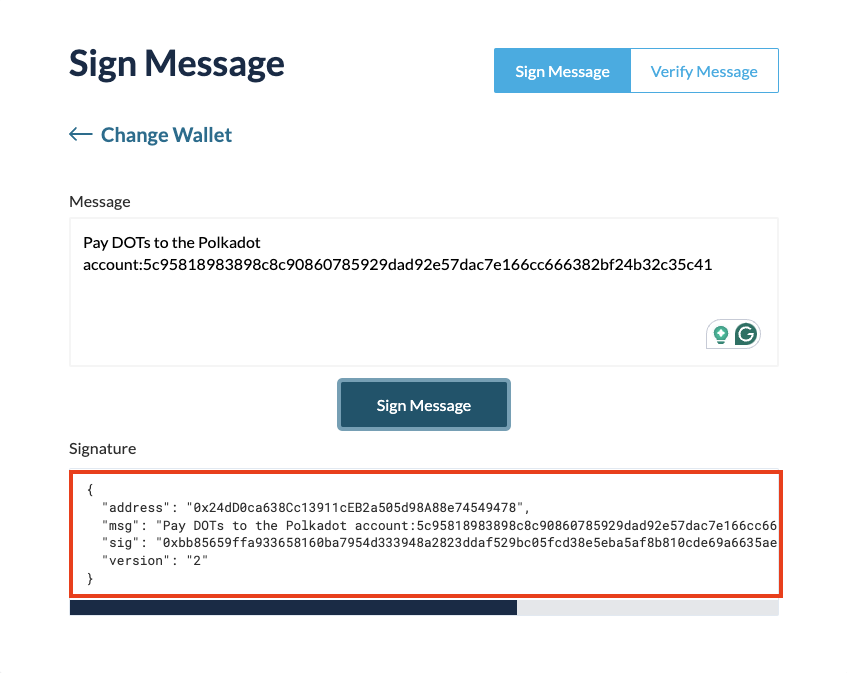
Copy and paste the JSON output of the signed message from MyCrypto into the input box on the Bitzal-JS UI and click "Confirm Claim."

At this point, if you are eligible, you will see a success message if everything went right and your tokens will now be in the account that you claimed to. Congratulations! You can now participate in aspects of the network such as governance and staking.
Verifying your Claim
After you make an on-chain claim, your Your account balance should be updated immediately.